

People often wonder how we’re going to mount all the equipment that normally dangles from their tripod once they get it to AstroPeak. If they’re going to set it up themselves, they wonder what they should bring. If they’re having us do their install, they wonder how we’re going to do it and if they need to supply zip ties (aka tie wraps or cable ties), Velcro fasteners, or duct tape.
Most of us have figured out how to organize everything above the mount. But picturing how the stuff below the mount is going to be dealt with is difficult, especially if you don’t have a good handle on it at home.
If We’re Installing Your Gear
If we’re installing your gear, don’t worry — we got this. We’ll supply the zip ties. We’ll mount items to your pier based on cable length and avoiding snags. Bigger items like UPS’s will likely sit on the floor at the base of the pier.
If You’re Doing Your Own Install
Obviously, you can zip-tie things to the pier yourself. But if you’re doing your own install, you want to simplify things as much as possible. You’ll have a lot to do, so you’ll be thankful for anything you can do in advance to save time and effort, and to make sure you have all the cables and components that make up your rig. We’d like to describe a method that several AstroPeak tenants have used successfully.
Consider Using Metal Pegboards
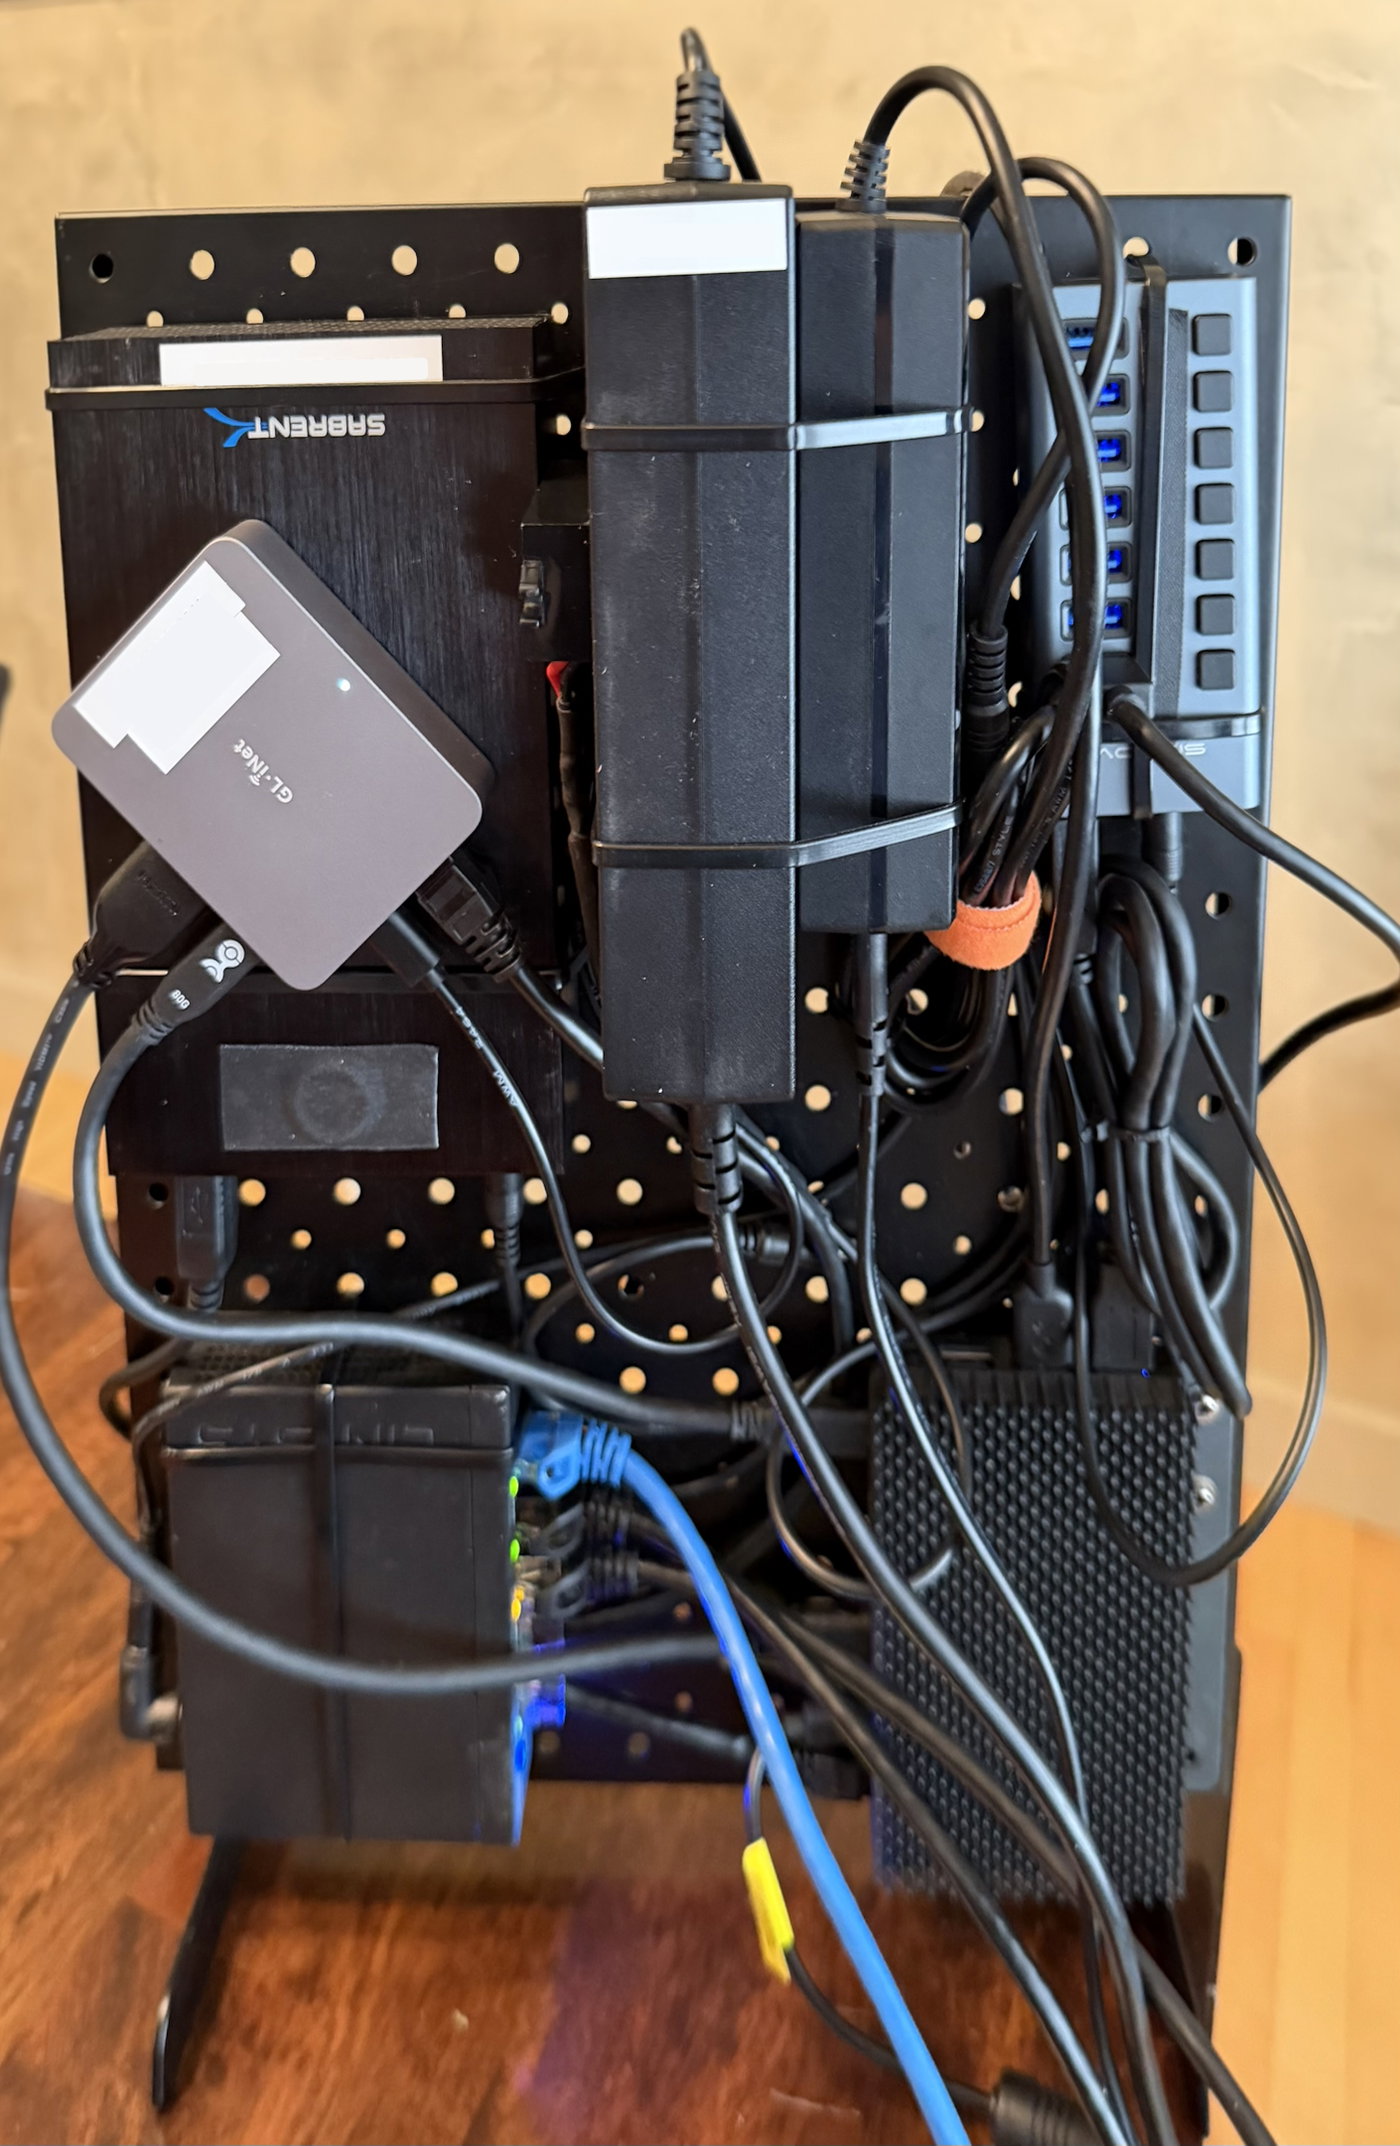
Below you’ll find a link to some 12” x 16” metal pegboards with feet on the bottom that allow them to stand upright. Mount your computer, power supplies, Ethernet switch if you need it, maybe even your power strip, to these boards with zip ties. At home, you’ll be able to more easily test because you can just pick you your board(s), plug it into power and Ethernet, plug 12V and USB from the board into extension cables running up your tripod to gear on top of your scope, and you’re up and running. At the observatory you’ll do the same thing — just a few minutes and a few connections and you’ll be able to concentrate on polar alignment, collimation, focusing your guide scope, and any other tasks needed to get you ready to image.
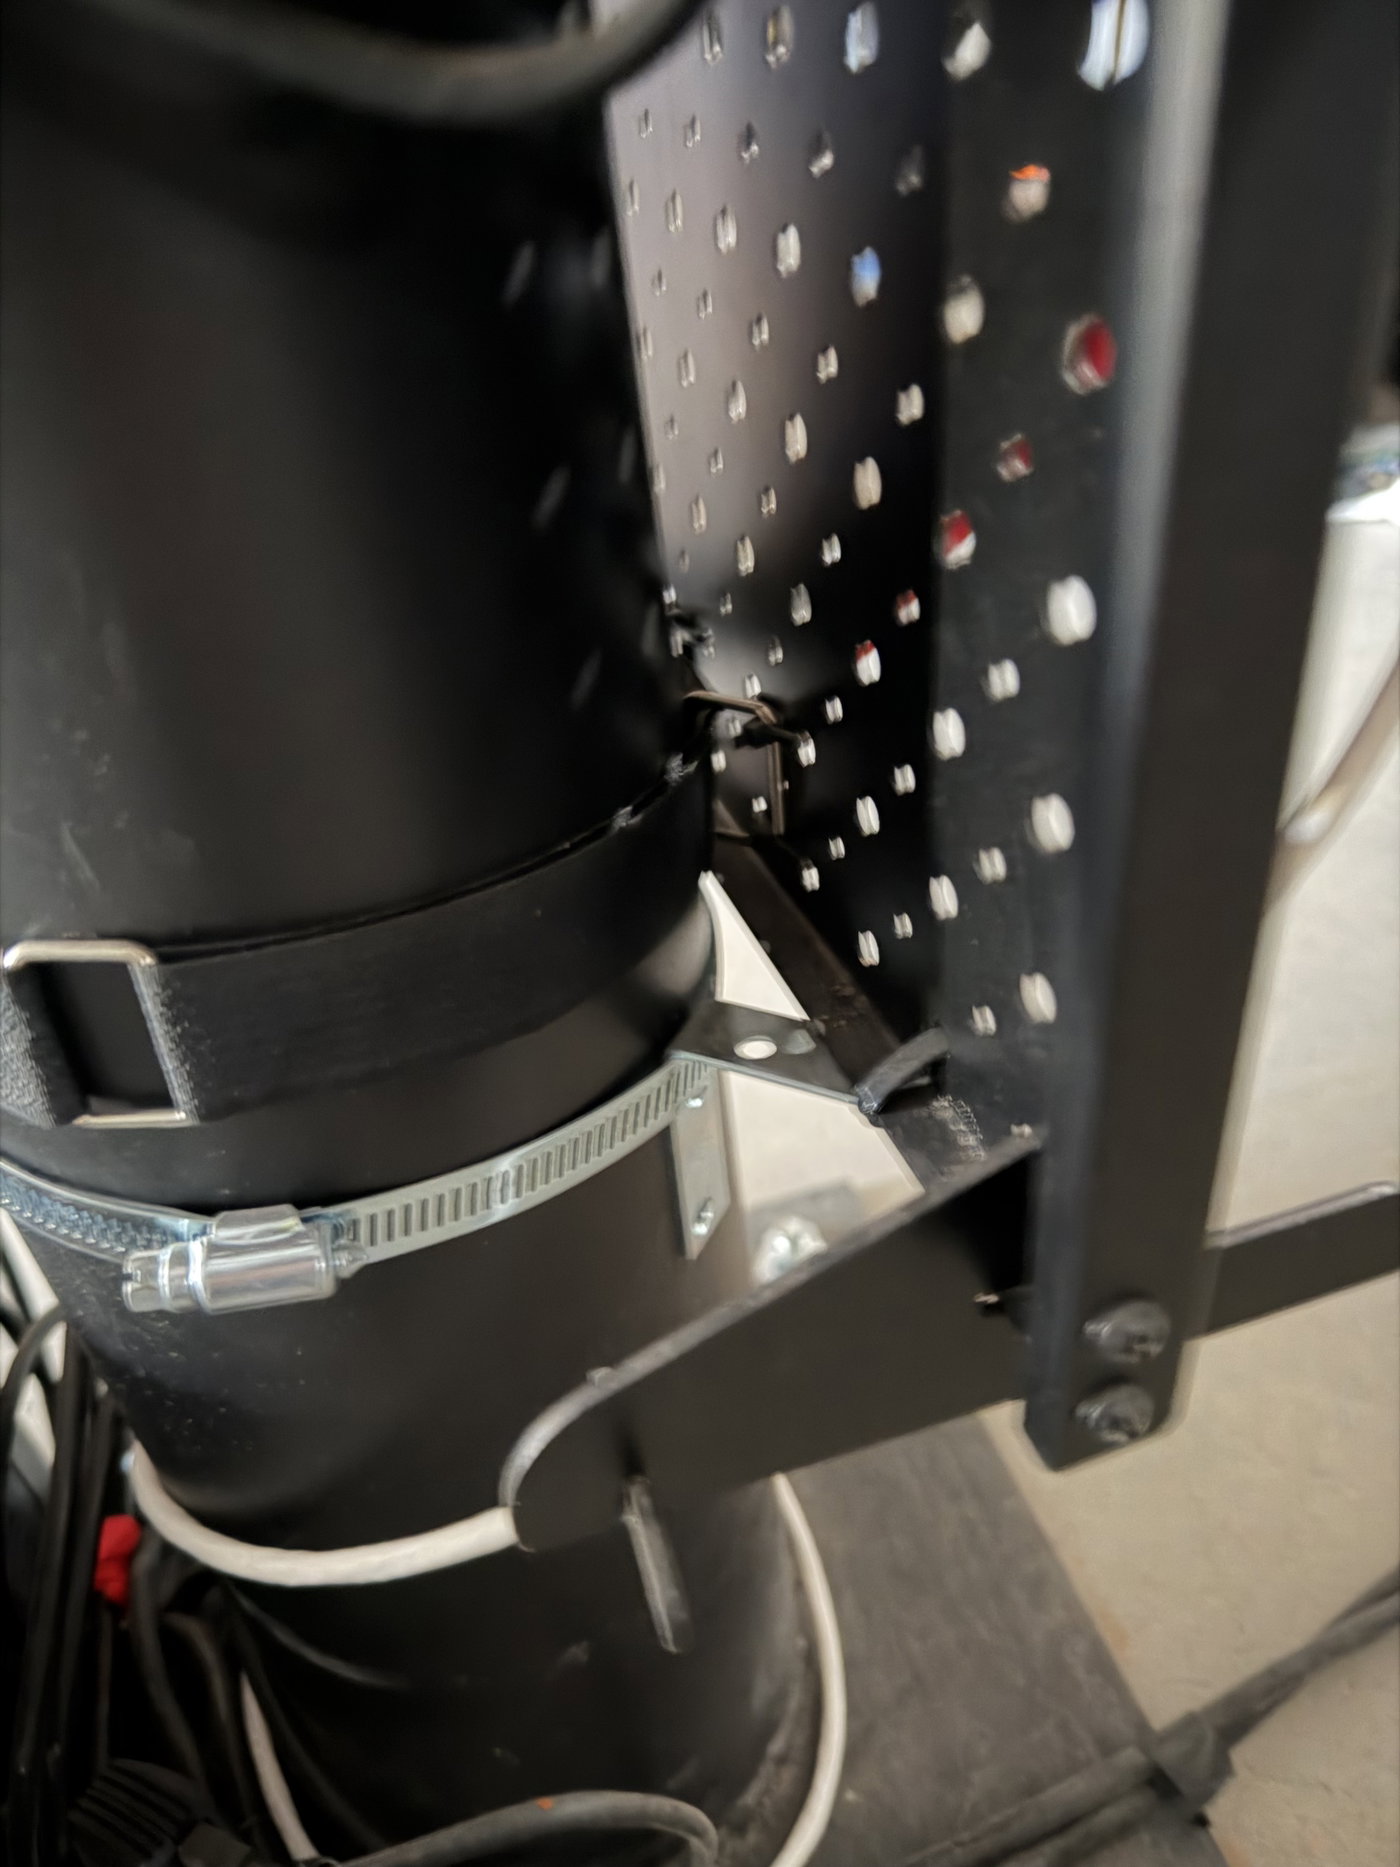
You’ll want to attach a hook-and-loop strap to the top of your board and wrap it around the pier to keep it from falling over. If you need to attach the board higher on the pier because of the length of your cables, consider using one or two angle brackets held in place by a 6” hose clamp to make a small “shelf” for the bottom of the board to sit on. Use zip ties to attach the bottom of the board to the angle brackets so they don’t slip off.
Design Considerations
Lay out your board in advance to avoid going through tons of zip ties when you have to remove components and move them. Some things to think about:
Power supplies for equipment on top of your mount should be near the top of the board so their output cords are closer to their destination.
Power cords and Ethernet cords should come in from the bottom, since that’s where power and Ethernet will come to your pier. If the board is going to sit on the floor, leave room for cords to be connected to devices.
Think about where cooling fans and passive cooling vents are located on devices that have them. Don’t put fans near the floor and don’t block vents. Heat rises, so if a case has vents on the side, they should be oriented facing up.
Remember the board has two sides. You don’t want to mount your gear on the back, but you can route cables across the back if it helps keep things organized.
Here’s what you’ll need:
Pegboards (Ultrawall Pegboard Display Stand at Amazon)
Hook-and-loop strap to secure the top of the board. (YMCRLUX 1"x32ft Hook and Loop Straps with 50 Metal Buckles at Amazon)
Zip ties (your local hardware store)
6” hose clamp (optional)
Angle brackets (optional)